Core Data is a framework provided by Apple for managing the model layer in our applications. When talking about MVC (Model, View, Controller) architecture, Core Data is essentially the Model part.
If you’re developing an iOS app in Xcode and you reach a point where you decide you need to use Core Data but it’s not enabled in your project — fear not! It’s possible to add in a few simple steps, which we’ll go through in this article. This technique will also allow you to easily add Core Data to other app project types such as Page Based or Tabbed Apps.
We will be carrying out the following steps to get Core Data into our existing app:
- Create a new Single View App with Core Data enabled — we can delete this project when we’re finished
- Copy the relevant parts from this project’s
AppDelegate.swiftinto our existing project’sAppDelegate.swift - Create a new Core Data Data Model in our existing project and name it appropriately
- Ensure the Data Model is referenced correctly
- Test!
Get our help adding Core Data to your project
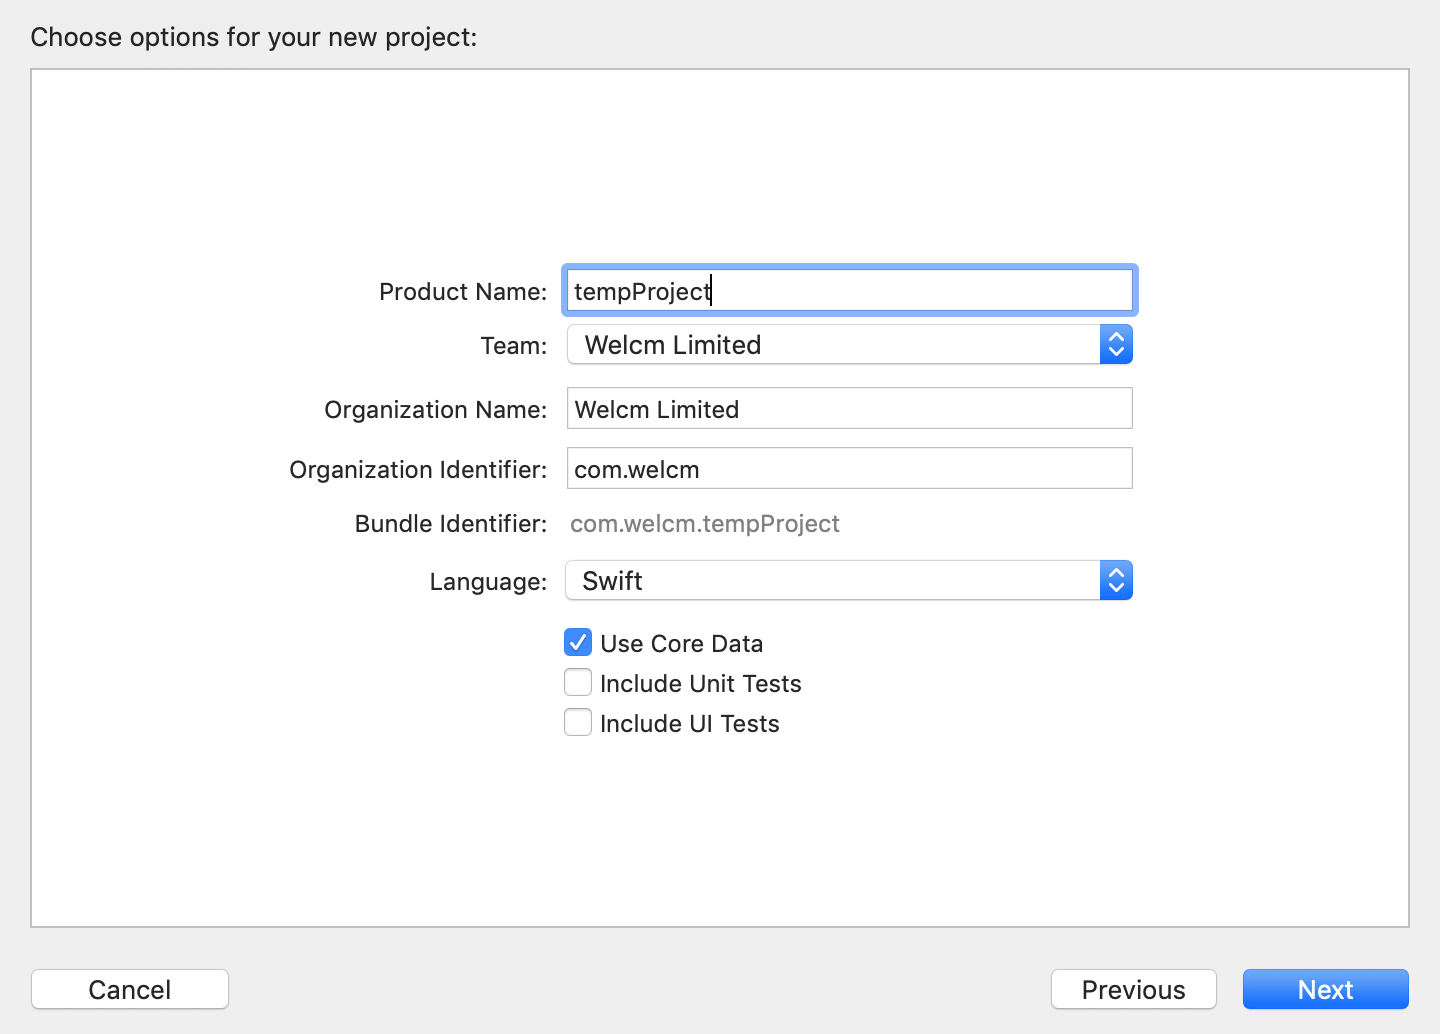
So, with your existing project open, create a new project in Xcode (⇧⌘N) and select a Single View App, you can call it whatever you like as we’ll be deleting it when we’re done. You’ll see the “Use Core Data” checkbox on the project options screen, make sure it is checked.
Now we need to open the AppDelegate.swift file in this new project and scroll down toward the end of the file, where we need to copy everything from applicationWillTerminate() to the end of the file:
func applicationWillTerminate(_ application: UIApplication) {
// Called when the application is about to terminate. Save data if appropriate. See also applicationDidEnterBackground:.
// Saves changes in the application's managed object context before the application terminates.
self.saveContext()
}
// MARK: - Core Data stack
lazy var persistentContainer: NSPersistentContainer = {
/*
The persistent container for the application. This implementation
creates and returns a container, having loaded the store for the
application to it. This property is optional since there are legitimate
error conditions that could cause the creation of the store to fail.
*/
let container = NSPersistentContainer(name: "your-data-model-file")
container.loadPersistentStores(completionHandler: { (storeDescription, error) in
if let error = error as NSError? {
// Replace this implementation with code to handle the error appropriately.
// fatalError() causes the application to generate a crash log and terminate. You should not use this function in a shipping application, although it may be useful during development.
/*
Typical reasons for an error here include:
* The parent directory does not exist, cannot be created, or disallows writing.
* The persistent store is not accessible, due to permissions or data protection when the device is locked.
* The device is out of space.
* The store could not be migrated to the current model version.
Check the error message to determine what the actual problem was.
*/
fatalError("Unresolved error \(error), \(error.userInfo)")
}
})
return container
}()
// MARK: - Core Data Saving support
func saveContext () {
let context = persistentContainer.viewContext
if context.hasChanges {
do {
try context.save()
} catch {
// Replace this implementation with code to handle the error appropriately.
// fatalError() causes the application to generate a crash log and terminate. You should not use this function in a shipping application, although it may be useful during development.
let nserror = error as NSError
fatalError("Unresolved error \(nserror), \(nserror.userInfo)")
}
}
}
Open your existing application and paste all of the above at the end of your application’s AppDelegate.swift file.
We’re now done with this temporary project, so feel free to close it and delete it.
Get our help adding Core Data to your project
At the top of your updated AppDelegate.swift file, you’ll need to import the Core Data library, so after this line:
import UIKit
Add:
import CoreData
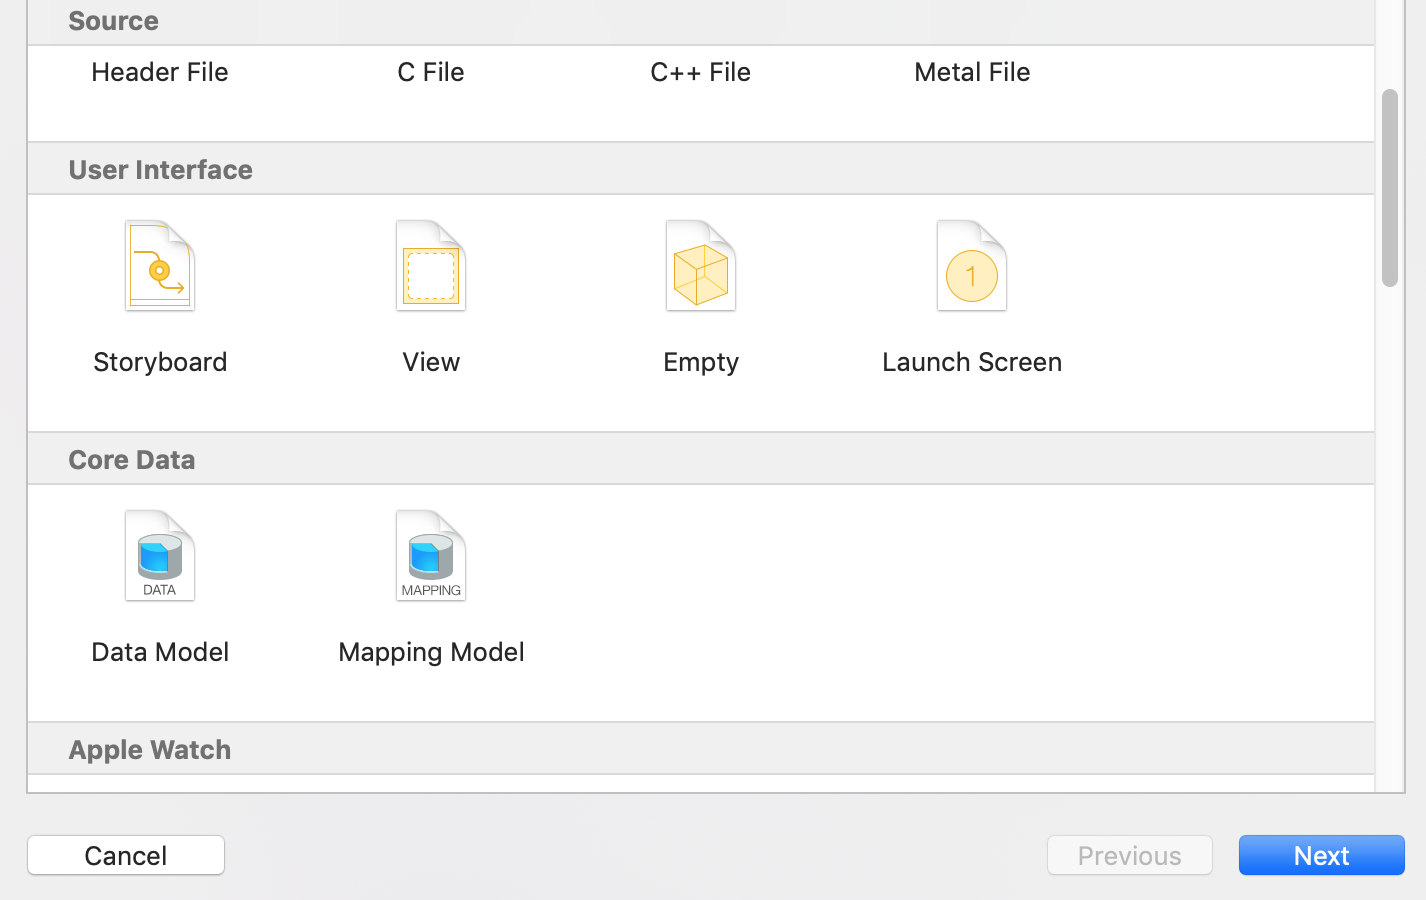
Now we need the actual Data Model file, so press ⌘N, scroll down to the Core Data section and select Data Model.
Choose a name (it makes sense to name it the same as your project), then you should see the yourProjectName.xcdatamodeld in the Xcode file manager.
The final step is to go back to the AppDelegate.swift and make sure that the following line:
let container = NSPersistentContainer(name: "your-data-model-file")
Is updated to reflect the name of the Data Model file you have created (i.e replace “your-data-model-file” with the yourProjectName part of yourProjectName.xcdatamodeld.
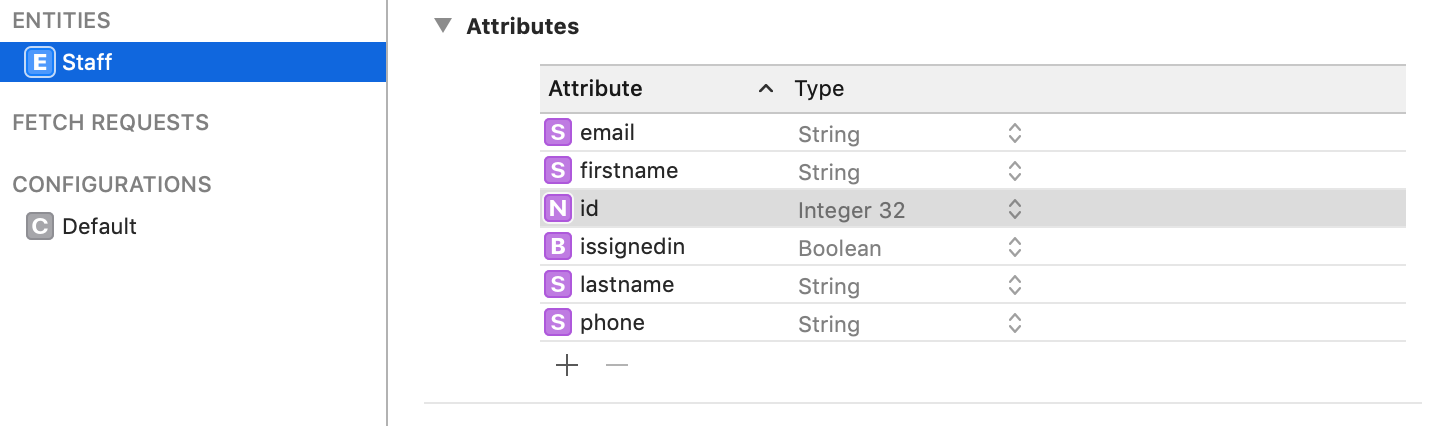
You can now go into the Data Model and start adding Entities and their Attributes, or whatever you need from the Core Data functionality.
That’s pretty much it! We hope this article has been useful and please get it touch if we can help with any of your app projects or ideas.