


Introduction:
Google’s reCAPTCHA v3 was introduced in late 2018 and brings a range of benefits over reCAPTCHA v2 and its familiar “I’m not a robot” checkbox and “select all the traffic lights” style of challenges.
Instead of requiring the user to complete these challenges, v3 calculates a score based on a number of factors to determine whether the user is a human or not, then allows the website to take an appropriate action based on this score.
Google understandably hasn’t made public the factors that build up this score but it is believed to include:
- User’s IP address
- The user’s browser
- Whether they are signed in to a Google account
And undoubtedly a number of other elements.
The benefits of v3 over v2 include:
- Less interaction required by the end user
- More effective at detecting bots
- More flexibility for the website to take different actions depending on the returned score
We’ve previously written a guide on how to implement reCAPTCHA v2 in Laravel, so let’s now look at v3.
How to add reCAPTCHA v3 to a Laravel project:
This will be a relatively quick tutorial with the aim of getting a form on your website protected with reCAPTCHA v3, so the implementation will be pretty simple, see the conclusion for details on improvements to how this could be used in your project.
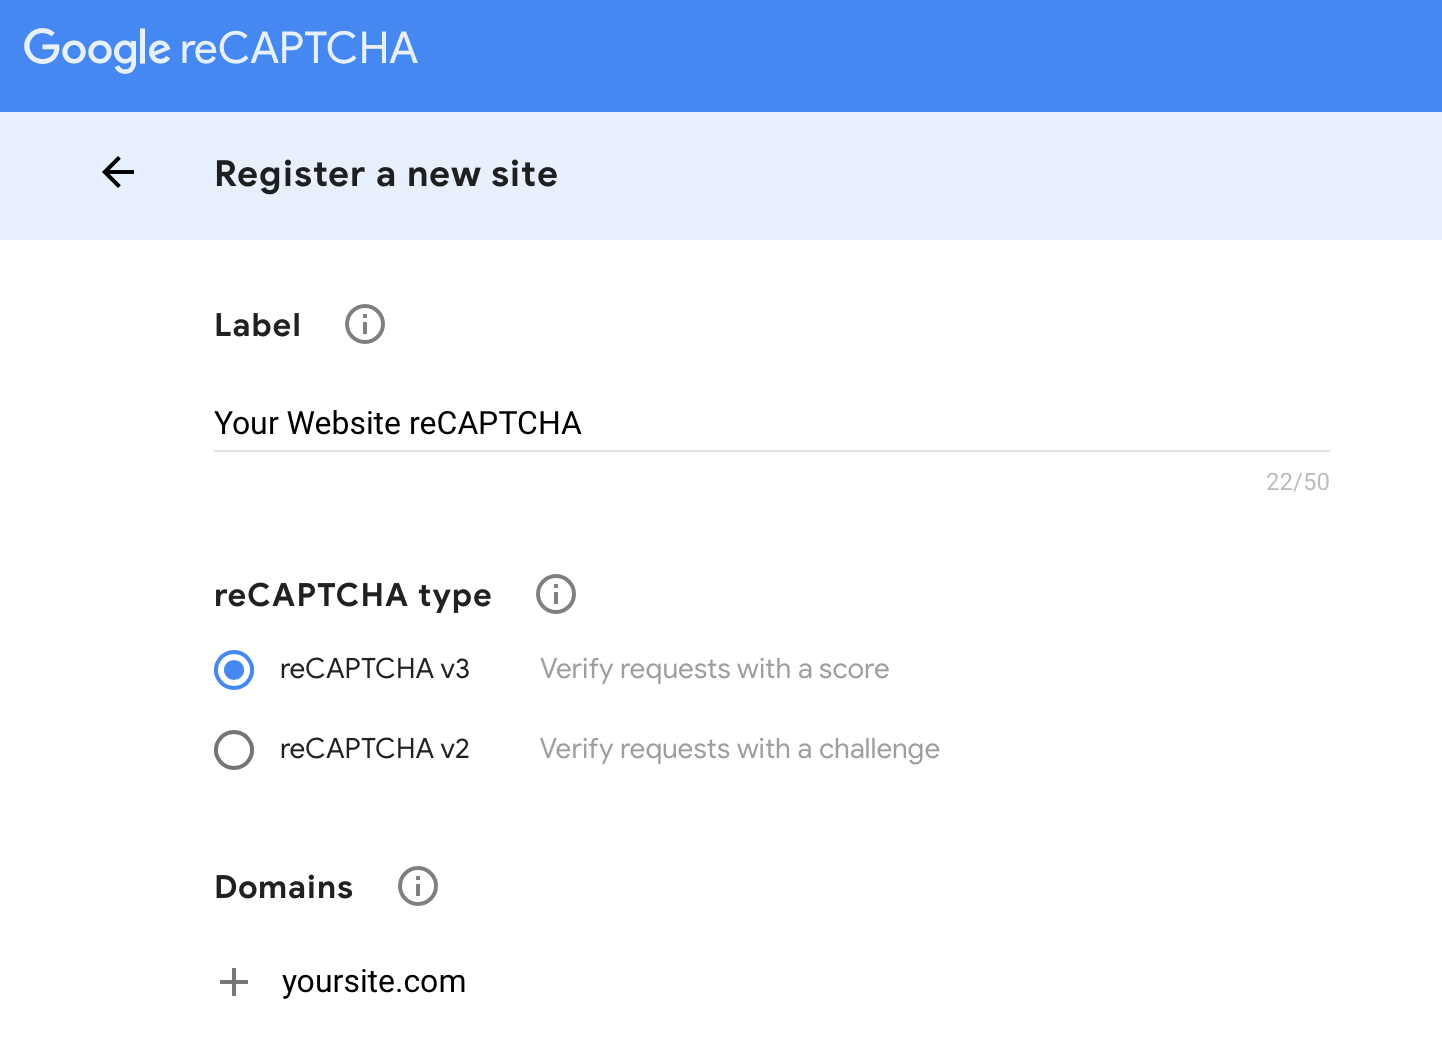
First, you need to go to the reCAPTCHA admin page and add your site and its relevant details, make sure the reCAPTCHA type is set to reCAPTCHA v3. You will be provided with two keys, a Site Key and a Secret Key, we’ll need these soon.
We’ll assume you already have a functioning contact form on your site, so we’ll need to make the following changes to your front end and back end:
- Add a hidden field in your form
- Add the reCAPTCHA JavaScript to any views that will contain your form
- Update the controller that handles your contact form
- Add your Site and Secret key parameters to your config and set them in your
.envfile
So let’s start with the view containing the contact form. Within your <form> tags, add <input type="hidden" name="recaptcha" id="recaptcha">, then add the following to your page scripts:
<script src="https://www.google.com/recaptcha/api.js?render={{ config('services.recaptcha.sitekey') }}"></script>
<script>
         grecaptcha.ready(function() {
             grecaptcha.execute('{{ config('services.recaptcha.sitekey') }}', {action: 'contact'}).then(function(token) {
                if (token) {
                  document.getElementById('recaptcha').value = token;
                }
             });
         });
</script>
Note the {action: 'contact'} part, you can specify different actions for different parts of your website and see the data in your admin console.
Important, from Google’s docs: “actions may only contain alphanumeric characters and slashes, and must not be user-specific.”, this means you cannot use ‘contact-us’ for example, you’ll receive an error.
Also note the lines containing {{ config('services.recaptcha.sitekey') }}, you could simply paste your site key here, but it’s better to set these in config and env files. So, in config/services.php in your Laravel project, add the following at the end of the file:
'recaptcha' => [
        'sitekey' => env('RECAPTCHA_SITEKEY'),
        'secret' => env('RECAPTCHA_SECRET'),
    ],
Then in your .env file, add the following:
RECAPTCHA_SECRET=YOUR_RECAPTCHA_SECRET_KEY
RECAPTCHA_SITEKEY=YOUR_RECAPTCHA_SITE_KEY
Replace YOUR_RECAPTCHA_SECRET_KEY and YOUR_RECAPTCHA_SITE_KEY with the keys from your reCAPTCHA admin panel that were generated earlier.
So that’s the client side and front end of the reCAPTCHA done, time to look at the back end and controller logic.
If you need hosting for your Laravel projects, we like DigitalOcean, you can get $100 hosting credit to try it out if you sign up via this link.
Essentially what we’ll be doing is sending a request to Google’s verification API with our secret key and a response token generated by the client side JavaScript on our form page. If successful, Google’s verification API will then return a response with a score for that particular request between 0.0 and 1.0, with higher scores more likely to be humans and lower scores more likely to be bots. We can then decide what to do with the form submission depending on the score.
So in your controller that manages your contact form, within the method that sends your form data, (for example, the store() method in a ContactController), we need to add the following:
$url = 'https://www.google.com/recaptcha/api/siteverify';
$remoteip = $_SERVER['REMOTE_ADDR'];
$data = [
        'secret' => config('services.recaptcha.secret'),
        'response' => $request->get('recaptcha'),
        'remoteip' => $remoteip
      ];
$options = [
        'http' => [
          'header' => "Content-type: application/x-www-form-urlencoded\r\n",
          'method' => 'POST',
          'content' => http_build_query($data)
        ]
    ];
$context = stream_context_create($options);
        $result = file_get_contents($url, false, $context);
        $resultJson = json_decode($result);
if ($resultJson->success != true) {
        return back()->withErrors(['captcha' => 'ReCaptcha Error']);
        }
if ($resultJson->score >= 0.3) {
        //Validation was successful, add your form submission logic here
        return back()->with('message', 'Thanks for your message!');
} else {
        return back()->withErrors(['captcha' => 'ReCaptcha Error']);
}
If we were to dd($resultJson); in the example above, it would return something like:
{
  "success": true
  "challenge_ts": "2019-05-16T12:41:15Z"
  "hostname": "welcm.uk"
  "score": 0.9
  "action": "contact"
}
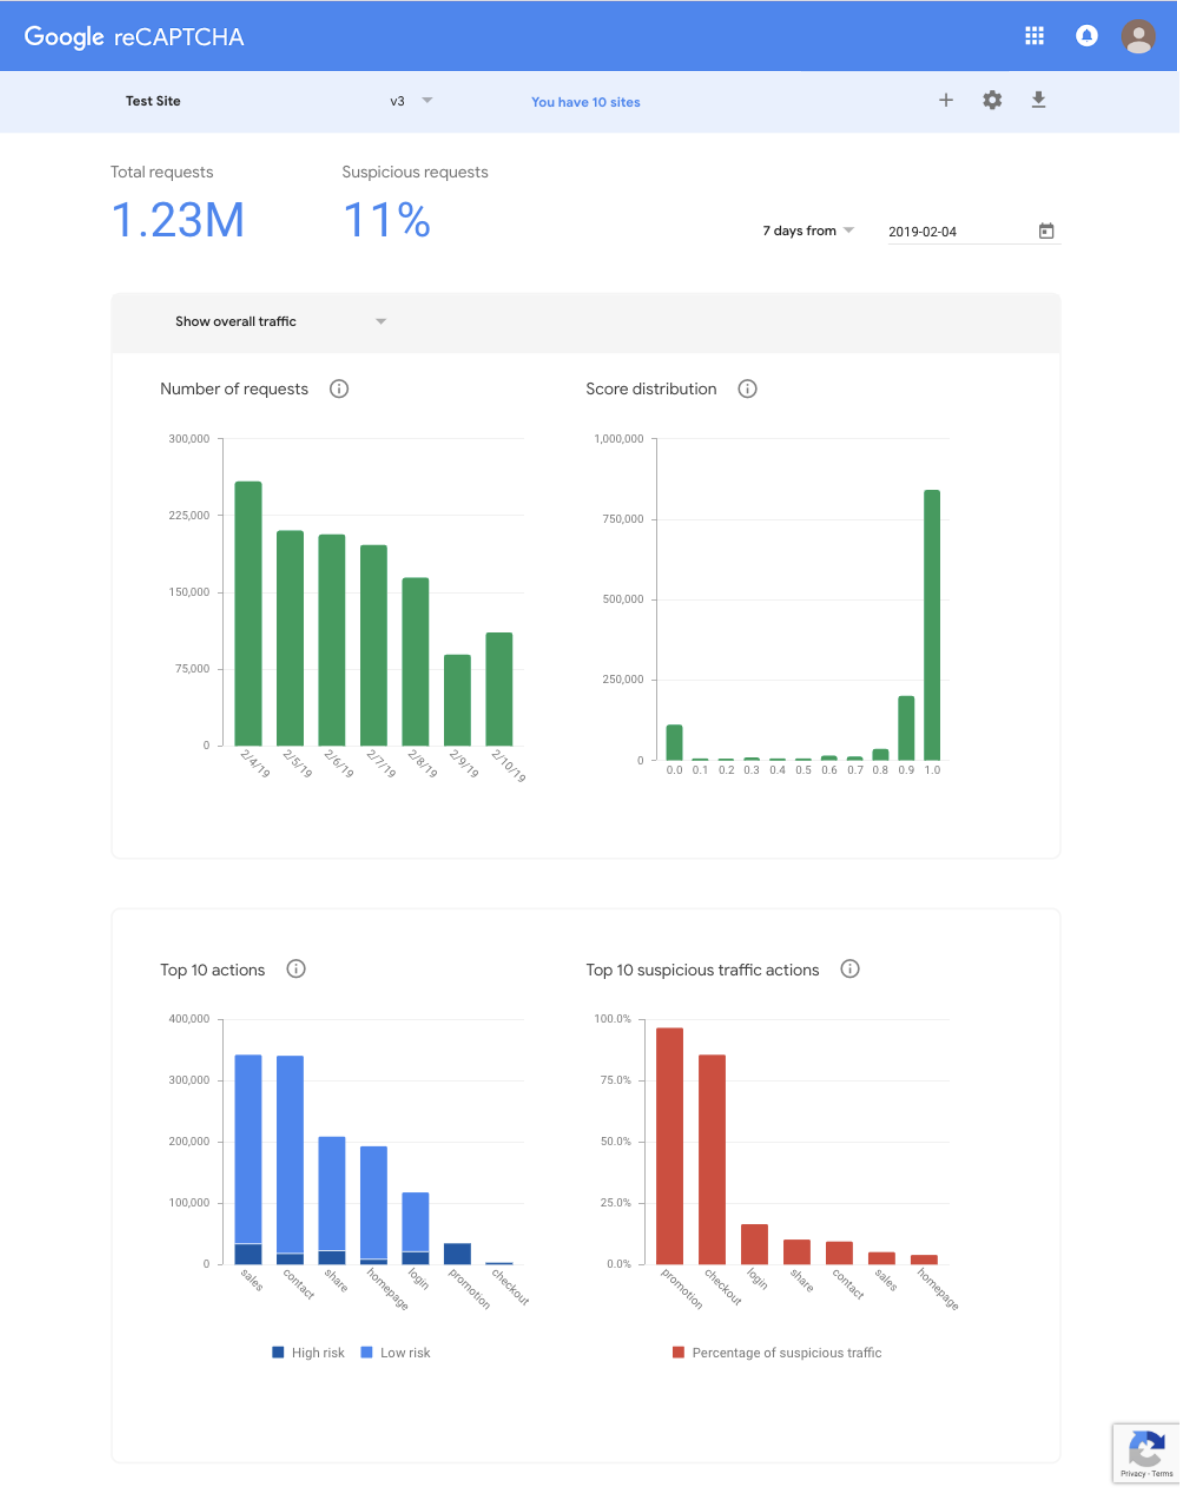
Note the “score” line, in the controller code above we’ve currently set the score threshold quite low, at 0.3, but you can adjust this to your liking, and also based on the data in your reCAPTCHA admin dashboard, which gives a breakdown of scores.
Conclusion and further improvements:
This a relatively simple example to get you up and running, you could improve the project structure and achieve the same result by using a form request object and by registering a custom reCAPTCHA validator.
Also note this doesn’t just have to be used on contact forms, it’ll can work for helping with validation of logins or new registrations too, for example.
Don’t forget to check out our article on building a Laravel contact form from scratch and also on designing bootstrap 4 contact forms.